


Email Setup
Connecting an email provider so your assistant can send automated follow-ups
This guide walks you through connecting an email provider to AssistifAI. You can connect an SMTP server (Gmail, Outlook, or any custom host) or Resend. Once connected, email automation is unlocked and your AI assistant can send emails on your behalf.
Prerequisite: AssistifAI account with access to Settings > Integrations.
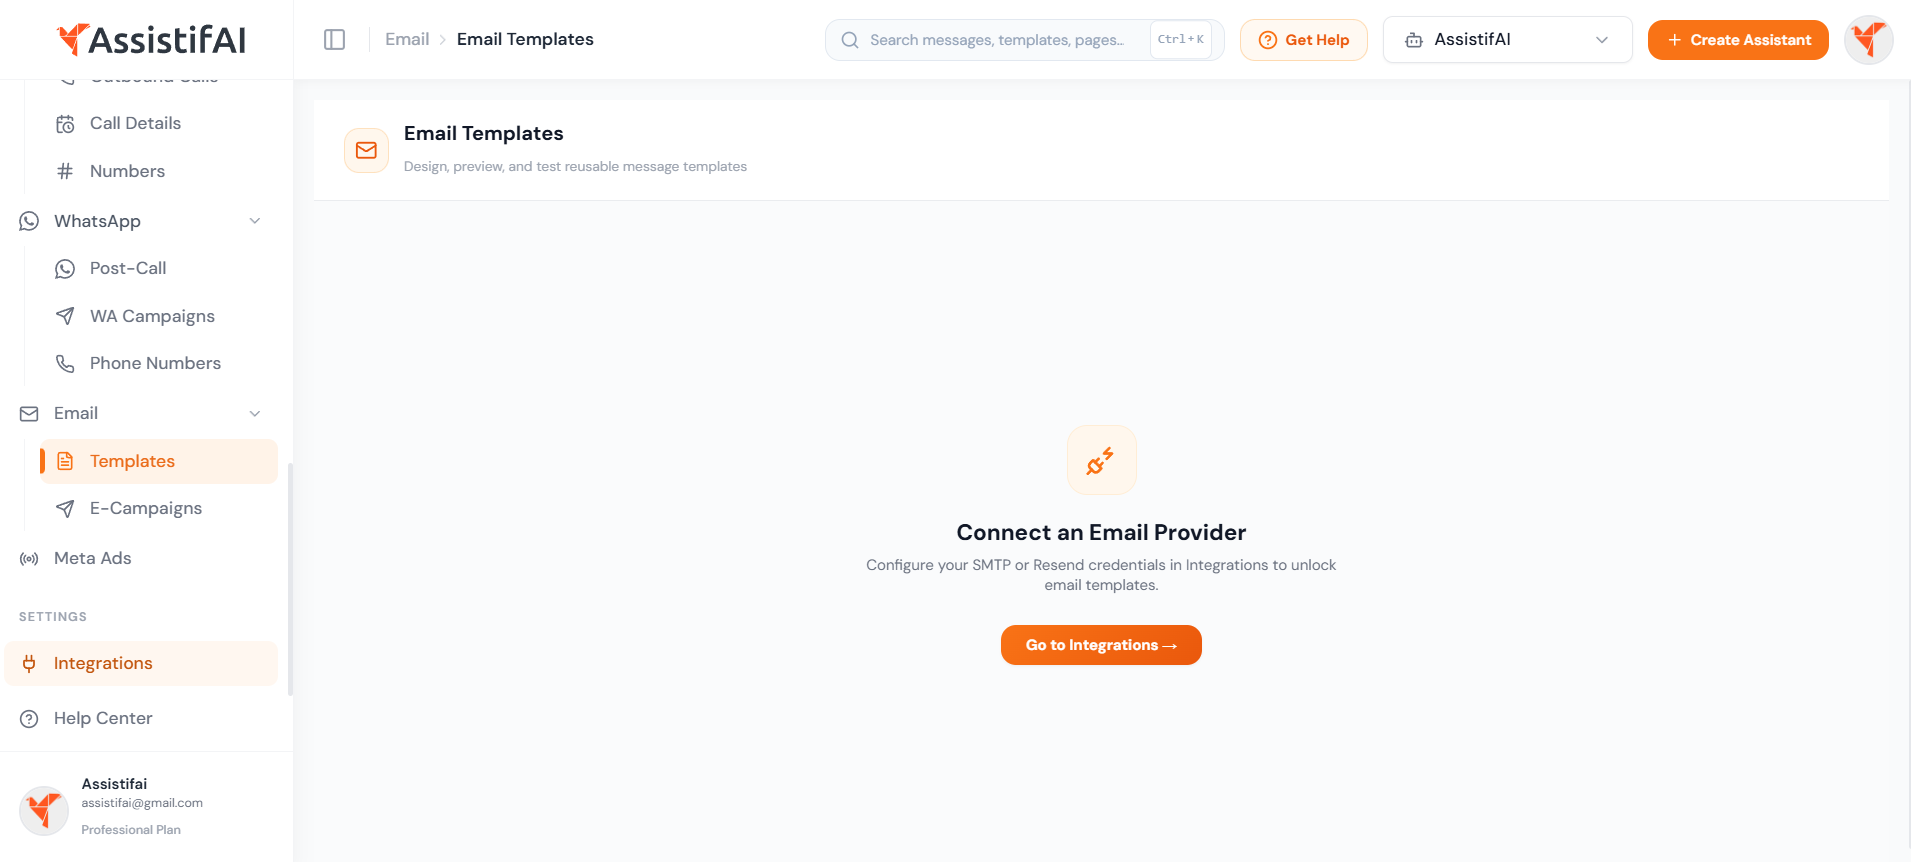
Step 1: Open Email → Templates or directly Open Integrations
In the left sidebar of your AssistifAI dashboard, expand Email and click Templates or directly open Integrations.
Step 2: Open the Email integration
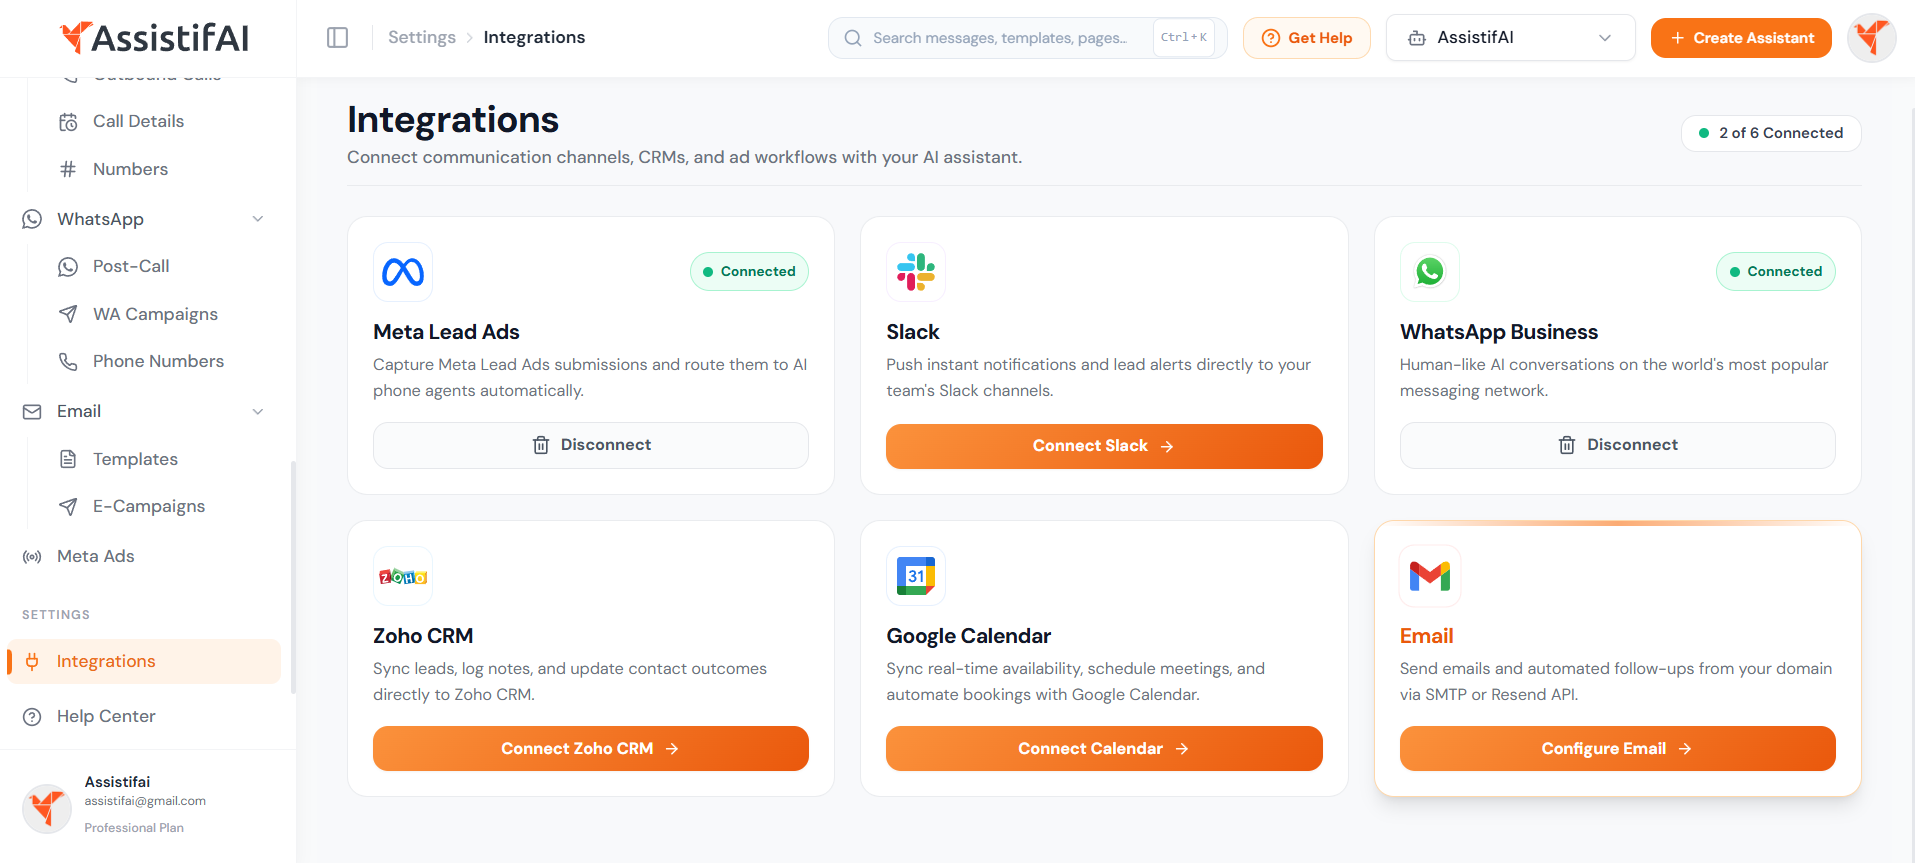
On the Integrations page, find the Email card and click Configure Email.
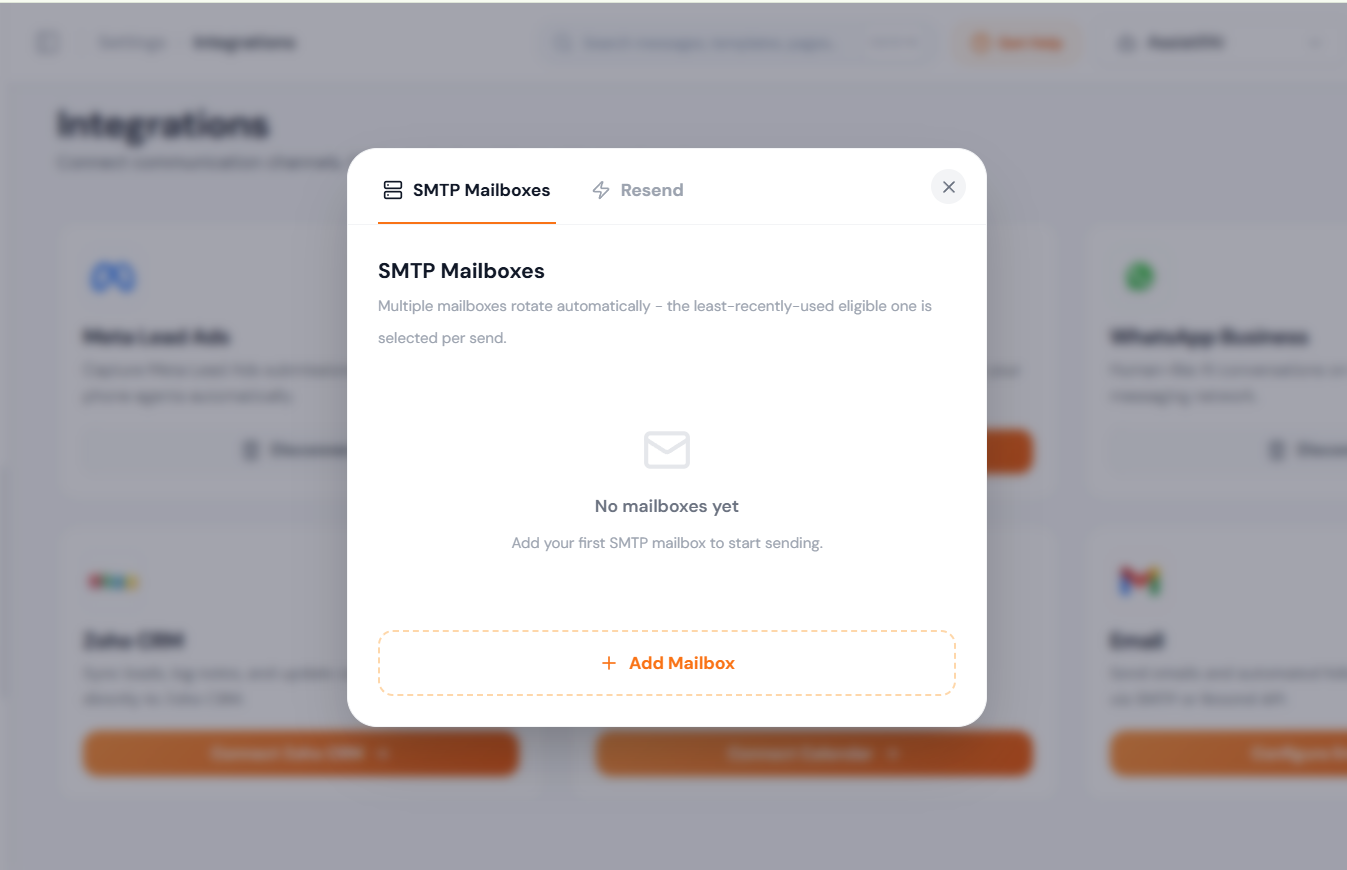
Step 3: Choose your email provider
In the Choose Email Provider tab, pick how your assistant will send email —SMTP (Gmail, Outlook, or any SMTP host) or Resend (modern email API).Credentials are encrypted at rest with AES-128.
Step 4: Configure SMTP
Ifyou chose SMTP, complete the form: From Email, Display Name, SMTP Host, andPort (587 for TLS, 465 for SSL), then your Username and Password / AppPassword. Keep Use STARTTLS on for port 587, or switch to Use SSL/TLS for port465. Click Save & Connect.
Tip: For Gmail or Outlook, generate an app password insteadof using your normal account password.
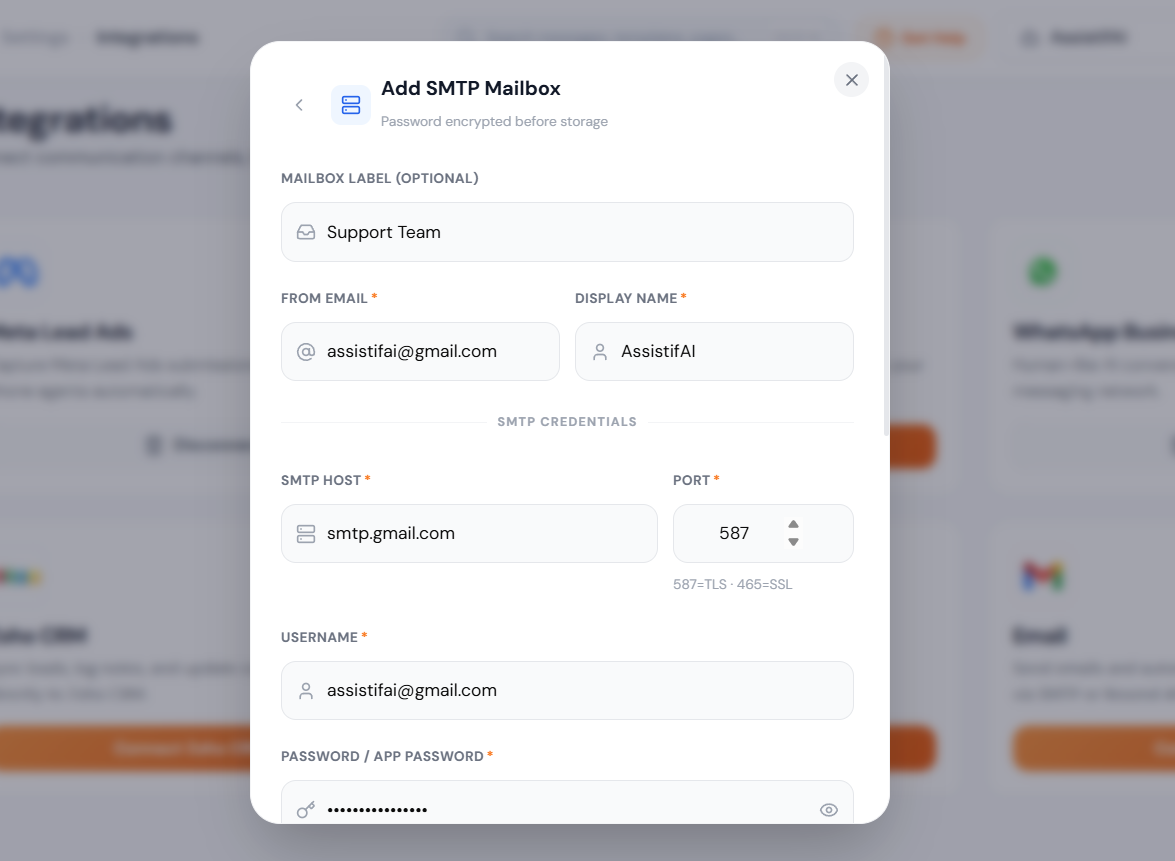
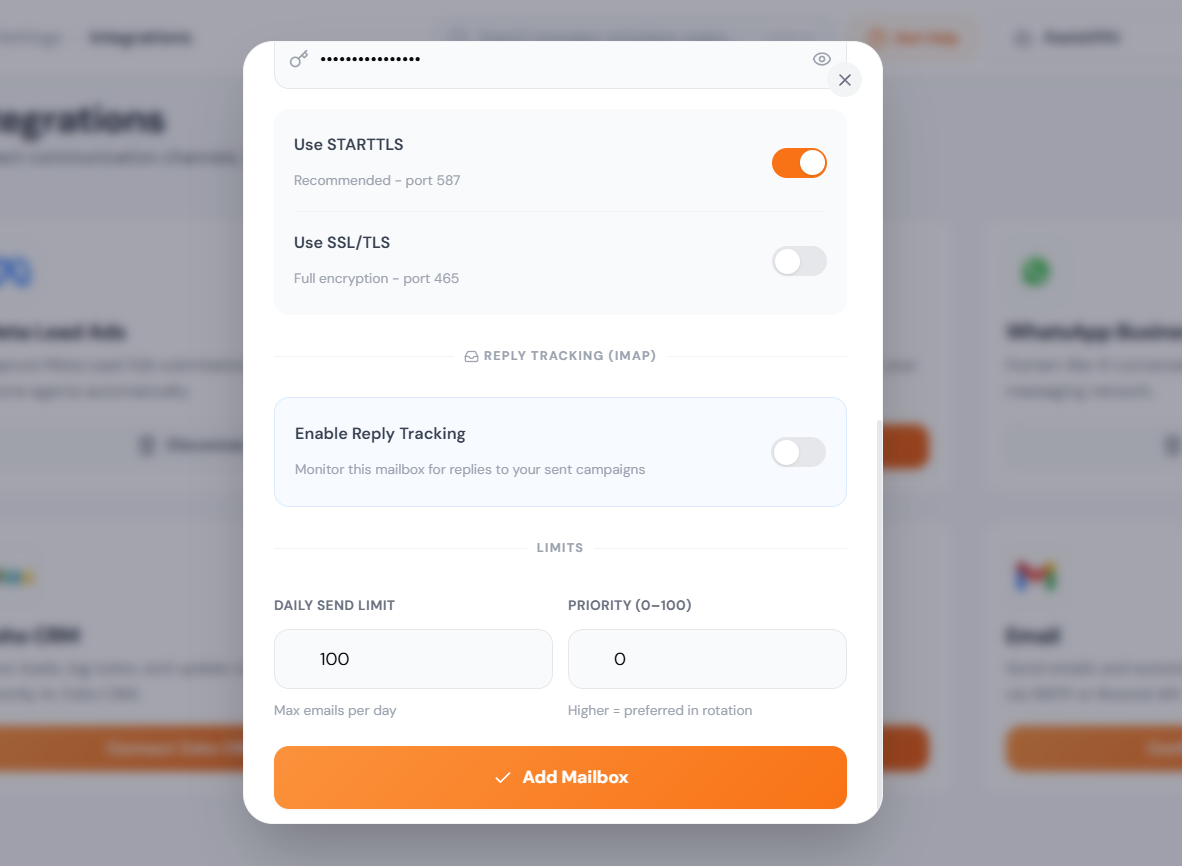
Fields
Encryption settings
Use STARTTLS (recommended)— Enabled by default. Uses port 587. This is the standard for most modern mailservers including Gmail and Outlook.
Use SSL/TLS — Fullencryption from the start. Uses port 465. Enable this only if your mail serverrequires it and disable STARTTLS.
⚠️Important: Enable only one of STARTTLSor SSL/TLS — not both. Using the wrong one for your server will causeconnection failures.
Gmail / Google Workspace setup
If you're using Gmail or GoogleWorkspace, you'll need an App Password instead of your regular Google password:
1. Go tomyaccount.google.com → Security → 2-Step Verification (enable it if youhaven't).
2. Scroll to Apppasswords and generate one for "Mail".
3. Use smtp.gmail.com asthe host, port 587, your Gmail address as username, and the generated AppPassword.
Outlook / Microsoft 365 setup
Host: smtp.office365.com
Port: 587
Username: Your fullOutlook email address
Password: Your Outlookpassword (or App Password if 2FA is enabled)
Once all fields are filled,click Save & Connect. AssistifAI will test the connection andconfirm it's working.
Step 5: Alternative— choose Resend
Prefer Resend? In the Choose Email Provider tab, select Resend instead of SMTP.
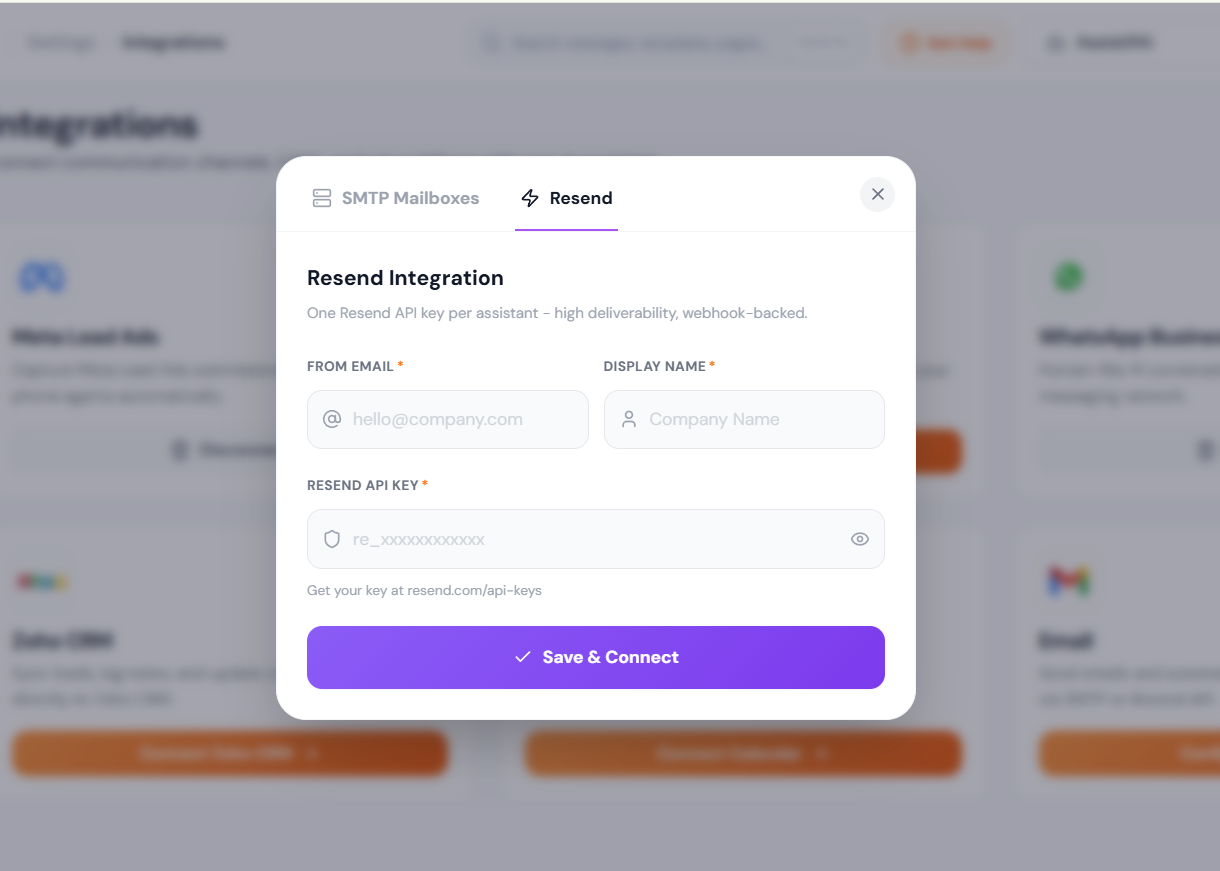
Step 6: Configure Resend
Enter your From Email, Display Name, and Resend API Key (create one at resend.com/api-keys), then click Save & Connect.
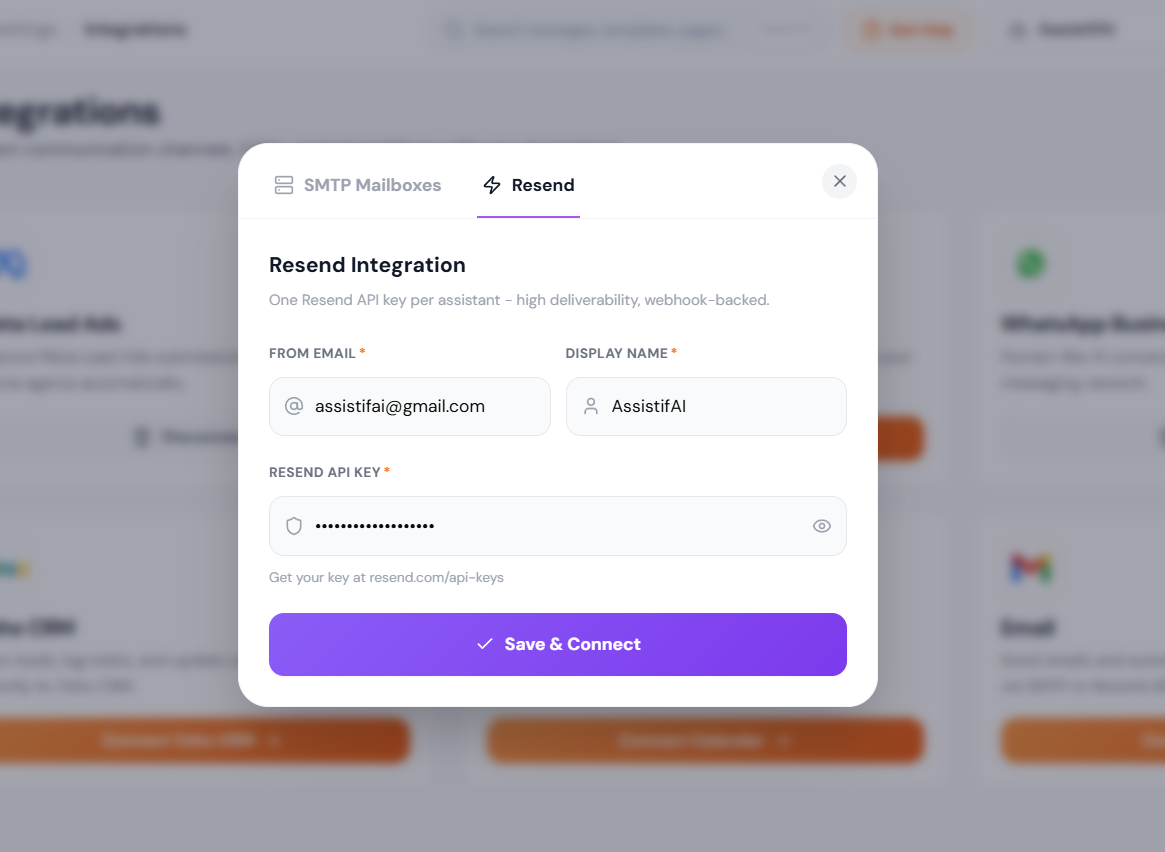
Fields
💡Tip: You can toggle the eye icon nextto the API key field to reveal or hide the key while typing.
Click Save & Connect to link your Resend account. AssistifAI will verify the API key and confirm the connection.
What Happens After Connecting
Once your email provider isconnected, the Email Automation page transforms from a setup prompt into youremail automation dashboard. From here you can:
Create email templates —Design the emails your AI agent will send, with variables for personalisation(recipient name, appointment date, property address, etc.).
Set up automation rules —Define triggers that tell the AI agent when to send each email (after aqualifying call, after a chat booking, on a schedule).
Create email campaigns —Send bulk emails to contact lists, similar to WhatsApp Campaigns.
View message logs — Trackevery email sent, with delivery status and engagement metrics.
ℹ️ Note: Email templates and campaigns are covered in separateuser guides. This guide focuses on the one-time provider setup.
Best Practices
Use a dedicated sendingaddress — Set up an address like ai@yourdomain.com ornoreply@yourdomain.com rather than your personal inbox. This keeps AI-sentemails separate and makes filtering easy.
Set up proper DNS records —Configure SPF, DKIM, and DMARC records for your sending domain. Thisdramatically improves deliverability and prevents your emails from landing inspam. Both SMTP and Resend require this for production use.
Use a recognisable DisplayName — Recipients decide whether to open an email based on the sender name.Use your business name, not a generic label.
Start with STARTTLS on port587 — It's the standard for Gmail, Outlook, and most modern providers. Onlyswitch to SSL/TLS on port 465 if your server specifically requires it.
Test before going live —After connecting, send a test email to yourself to verify the sender name, fromaddress, and content look correct.
For Gmail: use an AppPassword — Google blocks regular password sign-ins for third-party apps.Generating an App Password is the correct and secure way to connect.
Troubleshooting
"Connect an Email Provider" still showing after setup? The connection may have failed silently. Go to Settings → Integrations, find the Email card, and check whether it shows "Connected". If not, re-enter your credentials and try again.
SMTP connection failed? Checkthree things: (1) the host and port are correct for your provider, (2) you'reusing the right encryption (STARTTLS for 587, SSL/TLS for 465 — not both), and(3) your password or App Password is correct.
Gmail says "Less secure app blocked"? Google no longer allows regular passwords for SMTP.Generate an App Password under Security → 2-Step Verification → App passwordsin your Google Account settings.
Resend API key rejected? Verify the key at resend.com/api-keys — it should start with re_. Also confirm that your sending domain is verified in Resend (resend.com/domains).
Emails landing in spam? Setup SPF, DKIM, and DMARC DNS records for your domain. Without these, most email providers will flag your messages as suspicious.
Wrong sender name showing? Updatethe Display Name field in Settings → Integrations → Email. The change appliesto all future emails.

